Valentine's fun with all this candy and more!!!!!!!
I have a student teacher this semester and she was so excited to review with our fourth and fifth graders over weathering, erosion, deposition with valentines candy! She even had water, trash bags, and a poster board which all somehow represented landforms with candy and labels.
With our sixth graders we made a model of earths layers using chocolate chip cookies (crust), twizzlers (mantle), butterfingers (outer core), marshmallows (inner core)!!!! We put it on a small plate with icing to hold it all together. The students then place the plate inside a ziploc Baggie and label the layers and the food it represents.
I taught some very active 1st graders last summer. I have been thinking of active games I played as a child and made them educational. Here is what I'm dod with my first graders in summer school who were practicing on blends, dis graphs, and chunking. Here is a collage below. The top left uses the ziploc quilt idea found everywhere on Pinterest to display work but this is another way to use it too!
Here are some organization ideas for supplies your first week of school.
They (and sometimes siblings younger and older) are using sorting skills, problem solving skills, and most importantly they do most of the work and your don't have to! This also is modeling and showing organizational skills.
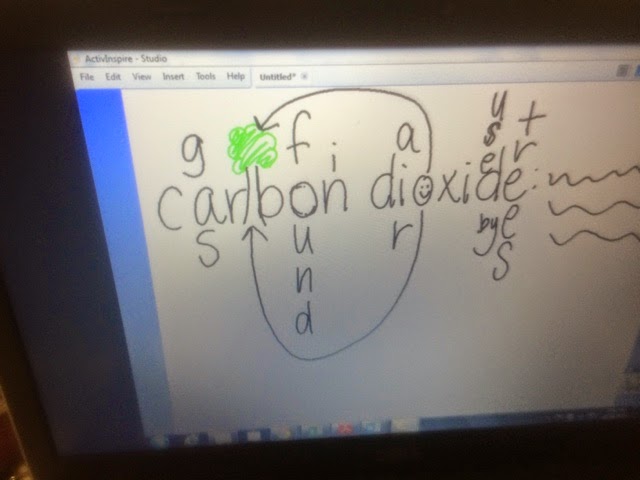
The article and video from CNN about 115! Today my class celebrated a birthday... the birthday of a new element on the periodic table! As the CNN article and video shows the element 115 nicknamed "Ununpentium" for now. Since at birthday parties there is usually cake, cookies, or cupcakes I brought a brownie cake and each of my students got a small piece of brownie to celebrate. Until another idea pops into my head, Chelsea
Well I was helping a friend with grammar (funny, I know!), especially with homonyms. I thought of where being a place and then noticed that there is the word "here" inside where and there. Since they are all places I decided to show this visually and of course my mind just started going crazy with ideas as usual!
Along with the difference of were and we're.
This would be a great visual for the wall or inside journals, as shown here folded up on a 8 1/2 x 11 sheet of computer paper.
I also showed the difference of you're, you are, they're, and they are using a flip up sheet that was taped down. Notice the colors and which letters are which colors.
Next I decided to show a visual for their. My mom helped me with "heir" and their so this is what I came up with for my visual to go along with the princess, king, queen, theme I started with.
On the left is my original and then (I am not perfect.... ha) my boyfriend Steven noticed I spelled throne wrong and left out "to." So of course my creative mind started turning again cause I wasn't about to redraw the whole thing again! This is when I decided to make a 3-D gold colored throne.
I have decided that my main form of teaching science safety will be using pictures from the internet and videos from YouTube. I have seen multiple safety videos made by students on YouTube and while going through them to find the best one I noticed that none were completely 100% flawless. I will show this video on the left (provide an example as how the video should be "graded" using the rubric. Then we would continue to watch the video which sums up and explains many of the rules and regulations we are to teach concerning lab safety and see if they caught them all.
This is when I decided to give each group of students a select video to view and then do a rating on the video including any flaws the video had. In essence they would be "grading" the certain lab safety YouTube video using a rubric I have given them. In the rubric the comments section should include how they would change be video and specific things that were "wrong" in the video concerning presentation and lab safety rules.
Here are a few videos I thought about using. Most of these videos use the rap by Rhythm, Rhyme, Results from educationalrap.com
Here is another video which can be used for younger students as well as a link. It would not let me post the video.
Then they can use the discussion from the first video and their knowledge to do this cartoon activity almost as a pre assessment before giving the lab safety test which must be passed in order to do labs in science class in the future.
http://www.biologycorner.com/worksheets/safety.html
At the bottom of the cartoon after the questions is also a "Lab Safety Teacher Guide" that provides possible answers.
I have also decided that I would have a final project that the students would complete choosing from these two options and possibly if a student has an additional idea they may ask me for permission.
1. A fashion show where they are to walk down and show improper lab attire and proper lab attire and explain why for both not only on a note card for me to grade and have a sample but as they make it to the end of the runway. (one I think my VERY talkative/outgoing always wanting to show off girls will REALLY go for and like)
Here is the video I used for the background music (of course not showing the video to the students)
I searched for a video that had a great flashy background to show as my students walked down a butcher paper "red carpet"
2. A personal sketch that must contain at least 4 colors /presentation using http://www.kerpoof.com/ /cartoon using http://www.toondoo.com/ /or another video or book site that I have showed my students or one they have used in the past. These must also show the improper and proper lab attire with a paragraph explaining. I will also have them present this to the class to work on social skills and speaking in front of their peers.
If you have other ideas or videos that would be great to use in a lab safety lesson please comment below.
Until another idea pops into my head,
Chelsea
Safety is the first thing that I must teach and instill in my students other than procedures when it comes to a science classroom that readily uses a lab. I have on many levels connected with my current students generation when it comes to social media, viral YouTube videos, television shows, and musical entertainment. I found this picture and couldn't help but put this on my website and eventually as a poster in my classroom.
As I found this I was searching for safety activities that are hands on and entertaining to students. Although, I taught safety last year it was most likely the least liked unit by the students and myself. I would LOVE input on how you teach lab safety in fun and exciting ways in your upper elementary/middle school classrooms.
So I have decided that since I'm doing fifth and sixth science next year (meaning I will have my last years fifth graders again in which I have built a strong relationship with many of them) that I want to incorporate more ways for my kiddos to contact me (other than school email... something they use more of.... meaning social media!) or message me with their opinions and ideas or just their kind words (hopefully haha).
I've created a "teacher" twitter account that I plan on using for reminders for homework, exciting things in the classroom, retweets of scientific knowledge, and school reminders as well. This will also be a great way for parents to see upcoming tests, homework, and activities too if their child never brings home the weekly newsletter.
I've decided on a vague twitter "handle" as they call them because being in a small district I could become a math, reading, social studies, second grade, fourth grade, heck even HS with the proper previous testing in the future. I also decided that one day my last name/email for which ever district I work in may change so I decided on @TeachOpenMinded which also goes along with my philosophy and this blog name. Consistency seems to help with many things in life.
If you are new to the twitter vocab here is a great resource THE TWITTER GLOSSARY!
One of my favorite shows used in the classroom. As soon as I heard the sentence while watching the show I immediately went to YouTube to find the scene!
I am staying right on the beach in Homer, Alaska where it is said to have one of the most drastic tide differences. I have decided to do a little daily record for myself. I am just truly amazed! I have taught about tides but I have never seen it myself. I can't wait to teach about tides with my own pictures : )
I took these pictures with HDR turned on, on my iPhone and then used a text in picture editor app to add the time on top. I'm a little obsessed with this app now... It's so fun and you can keep your original picture clean without the text as well in your photo library!
I started to take these on 6/10/13
It is officially 6/11/13 now and I'm still watching the tide!
I can only view on my phone so anyone viewing on a desktop or laptop may be able to see it better but it was about as dark as Alaska gets at this time of the summer.
This glacier ice is not from Ruth's glacier but rather from another glacier we viewed after a boat ride from Seward out to resurrection bay which is in the Kenai Pennisula. Glacier Pictured below
Ruth's glacier is below
I am currently on a FABULOUS trip in Alaska and have been thinking about science and teaching about 50% of the time! So many things tourist guides have told me, multiple Alaska children's books, and beautiful pictures and videos I have captured can be used in the science classroom. I am in heaven for many reasons! I have decided that I want to visit every biome possible and take pictures because it will be so fun to teach about the tundra and glaciers considering I have now not only touched glacier ice but landed on a glacier in a plane!
This is a picture of the plane we rode around Mt McKinley (the first picture below) and eventually landed on Ruth's glacier(the picture above).
So I have seen many people posting on Facebook about these 4 pictures and saying help and not knowing what the heck it was really... I began to think how I could use this in the classroom with vocabulary and I'm not sure if I was asleep and dreaming or if it was one of those morning where I couldn't sleep and thought up this idea.
I finally decided to ask someone what the name of the game was and they told me that it was called four pictures one word. I downloaded the game from the App Store and started playing it. It was super fun and kind of addicting.... ha who would have thunk it... A game that is an app on the iPhone that's addicting.
Here is my first one I created (I am still working out details on how to separate te pictures and mine is more than 4 pictures and the answer is more than 1 word) using pic jointer which is also a free app from the apple app store and don't forget it is for fifth grade science... I plan on starting easy and this being kind of a bellwork idea possibly and after they figure out the word they think mine is from the four pictures they will have to create their own with different pictures but using the same vocabulary word.
I hope to have a few more up in the next few days and maybe better quality with actually 4 pictures and 1 word. This was just a quick one I thought up to get my mind rolling.
Hope you enjoy this and can maybe use this in your classroom.